FUSION RESIN SYSTEM
Wednesday, 23 August 2017
Monday, 5 October 2015
Fusion Resin System
Aphrodite Fusion Cast Epoxy
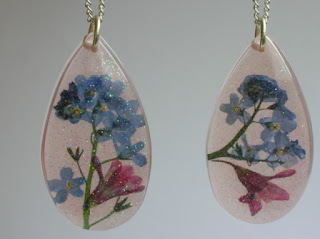
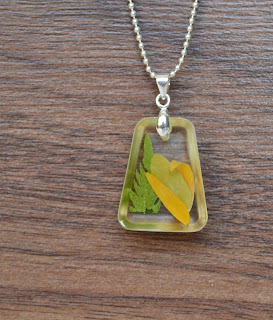
How to Make Botanical Jewelry and with Pressed Flowers and Fusion Epoxy
Supplies:
A two part clear epoxy resin kit Fusion Aphrodite ( Casting 100 or Casting 125 )Resin jewelry mold either pre-made or cast from clay
Measuring cup (that will not be shared with food products) OR Medical Syringe
Sturdy disposable mixing cups
Toothpicks or disposible crafts sticks
Your favorite type of pressed flower (you can also use seashells or bugs)
Large necklace pinch bails (you can substitute a screw bail if you prefer)
A standard drill with an 1/16" bit or craft drill that can drill through resin
Make Your Own Botanical Resin Jewelry
Creating botanical resin jewelry is moderately easy and lets you create very beautiful and unique pieces to keep, give as a gift, or to sell. No two pieces will turn out the same and any pressed flower that will fit in the mold can be used in your design.Instructions:
The first and most important step in creating resin jewelry is to properly prepare the mold. When purchasing a mold, it is important to make sure it is smooth and flawless inside the casting areas. Any imperfections in the mold will appear in your finished product. If your mold is new, wash it with hot water and dish soap. Let it dry thoroughly. When dry, spray the mold release product to the entire mold heavily, making sure it gets into the jewelry cups. Allow the spray to sit on the mold for at least 10 minutes. Use a paper towel to wipe the spray from mold. Make sure there are no puddles inside the cups.Next, place your flowers inside the individual resin cups. Make sure the fancy side of the flowers are facing down as this will be the side that will show on your piece of jewelry.
Prepare the resin mix according to the package instructions. When it is prepared, get a drop of mix on a toothpick or craft stick. Slowly drop the resin solution from the stick into one of the mold sections on top of the flower. Repeat this step until the cup is full. Do not overfill the cups with resin as this will become part of the pendant.
Give the mold about five minutes to start curing. If air bubbles will occur, they will begin to rise. You can pop them with a sharp pin or use a hair dryer blown across the tops of the cups to blow the bubbles out of the mix.
 The resin mix will become solid in as little 6 hour . In this time the flower may float around the mold.
During this time you can recenter it with a craft stick. If you move
them, do so slowly with little pressure. Pressed flowers are very
brittle and may break. When this happens to me, I scoop the flower and
all its broken pieces out and replace it with another flower before the
resin dries.
 Do not touch the resin for at least 8 hours or your fingerprints will
permanently appear on the jewelry. The resin must cure in a dry place
outside of wind and dust. It is best to allow the resin to harden
overnight.
Do not touch the resin for at least 8 hours or your fingerprints will
permanently appear on the jewelry. The resin must cure in a dry place
outside of wind and dust. It is best to allow the resin to harden
overnight.When the resin is cured, it will not have a tacky feel to it. It is ready to be removed from the mold.
 After removal, any uneven edges can be trimmed with scissors. Very
jagged edges from overfilling cups can be sanded with fine grit
sandpaper. Never sand the front of the pendant unless you plan or
recoating it.
After removal, any uneven edges can be trimmed with scissors. Very
jagged edges from overfilling cups can be sanded with fine grit
sandpaper. Never sand the front of the pendant unless you plan or
recoating it.Using a drill, drill a small hole in the front of the pendant all the way through the back. This is where you will insert the pinch bail. If you prefer, you can drill a hole into the top of the pendant and insert a screw bail. Put super glue on the bail tips and slide them into hole. Squeeze them to close the bail. If necessary, tighten with pliers.
Your pendant is now ready for a chain and ready to wear and enjoy!
Special Tips and Suggestions:
-
To prevent large and small bubbles from erupting during the curing
process, warm both parts of the resin solution before use. Place them in
warm water for 10 minutes before mixing.
- It is easier to get the pieces out of the mold by tapping it from the back. This will also save your mold so you can reuse it.
- If you make a mistake in a piece of resin jewelry such as fingerprints or an indention, the piece may still be salvageable. Allow the piece to dry completely. Wet sand the entire surface of the piece with fine sandpaper, at least 220 grit. Allow the piece to dry overnight. It will look very cloudy. You can apply a thin coat of new resin to the surface and it will be as good as new.
Saturday, 4 July 2015
Aphrodite Fusion cast is a two-component, low odor, solvent free, clear casting epoxy!
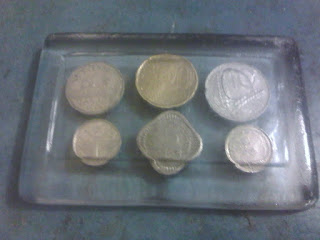
Its ideal for casting small decorative items, such as jewelry gems and beads, kitchen and bathroom knobs, hobby parts, etc.
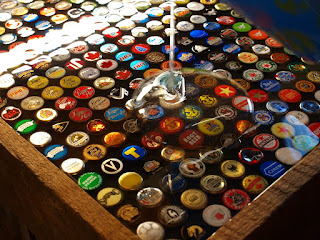
Aphrodite Fusion cast with opaque pigments for solid colors, or transparent dyes for that colored glass look. Ideal for flexible rubber molds since there are no shrinkage or surface curing issues (tackiness).
INSTRUCTIONS:
Aphrodite Fusion cast was designed for a maximum glossy and scratch proof.
1. IMPORTANT: Aphrodite Fusion cast performs best at 75° F / 24° C. Aphrodite Fusion cast bottles should feel slightly warm to the touch, if they feel cool, they must be warmed by placing them in warm tap water (not hot) for 5 to 10 minutes prior to using. If bottles become overheated, allow them to cool before using.
2. MEASURE: Carefully measure amounts of resin ( 1 ) and hardener ( 0.4 )into a straight sided, flat bottom, wax free measuring container. WARNING: Do not vary the 1 to 0.4 ratio for any reason! Failure to measure equal amounts of resin and hardener will result in soft or sticky castings. Do not simply pour the contents of both bottles and expect to get properly measured amounts, always measure!
3. DOUBLE MIXING (REQUIRED): For Aphrodite Fusion cast. to chemically blend, it must be mixed together in two stages. With the resin and hardener measured, use a stir stick and mix together for two full minutes. During mixing, use the stir stick to scrape the sides and bottom of your mixing container. Occasionally scrape the mixture from your stir stick back into the solution. After two full minutes of mixing, pour the contents from the first container into a second container. Using a new stir stick, mix the contents of this second container another minute, again scraping sides of container and stir stick. Pour immediately from this second container.
4. BUBBLES: Aphrodite Fusion cast has been formulated to self degas within a few minutes of pouring under most casting conditions. However adding fillers such as granite or metallic powders can result in a cloudy, bubble filled mixture. These bubbles will slowly rise to the surface of your cast. If needed use a hair dryer and pass heated air quickly over the Aphrodite Fusion cast surface to remove bubbles. Be careful, excess heat can melt or warp plastic molds.
5. CURE: For best results, cast pieces should cure at temperatures between 70° F / 21° C and 85° F / 29° C. Curing time will vary depending on room temperature and thickness of cast. Thin castings will take longer than thick castings. Normal cure for castings 1" thick is 24 hours for soft cure, 72 hours for hard cure.
6. DE-MOLDING: Rigid type plastic molds can usually be twisted slightly to break the cast pieces free. Pushing in from the back side of the mold will also help. Note: Do not attempt to de-mold pieces that have not cured for a minimum of 24 hours. You may damage your casting by doing so.
7. TRIM & SAND EDGES: Edges can be trimmed with a knife or sanded if needed. Use 150 grit or finer sandpaper to remove excess material. A file, sander or Dremel tool can be used for shaping and carving completely cured castings.
8. CLEAN UP: While liquid, the material can be cleaned from tools with alcohol or solvent. Use warm water and liquid soap to clean from skin.
Subscribe to:
Comments (Atom)


